
Introduction
In the world of cloud computing, serverless architecture has gained immense popularity due to its scalability, cost-effectiveness, and simplified management. One of the best ways to harness this architecture is by deploying serverless applications. However, for Windows users, understanding how to run a serverless deploy on Windows can be tricky without proper guidance. This guide walks you through the essential steps, tools, and tips for running a serverless deploy on Windows seamlessly.
What Is Serverless Deploy?
Before we dive into the specifics of how to run serverless deploy on Windows, let’s clarify what serverless architecture is. Serverless is an execution model where cloud providers automatically manage the infrastructure for application deployment. You don’t need to manage servers manually. Instead, the cloud provider automatically allocates resources based on the application’s needs. Serverless deploy means deploying applications to a serverless environment where you don’t have to worry about server management.
Why Use Serverless Architecture on Windows?
Serverless deployment allows you to focus on building and deploying applications without the complexity of managing the underlying servers. For Windows developers, this is especially useful because serverless architecture is typically associated with cloud services such as AWS Lambda, Azure Functions, and Google Cloud Functions, which are cross-platform and can easily run on Windows.
Prerequisites for Running Serverless Deploy on Windows
To run a serverless deploy on Windows, you need the following:
- Node.js and NPM: Serverless frameworks often rely on Node.js and NPM for package management and running scripts.
- Serverless Framework: The Serverless Framework is a popular open-source tool to deploy serverless applications across various platforms, including AWS, Google Cloud, and Azure.
- Cloud Account: A cloud service account, such as AWS, Azure, or Google Cloud, is required to deploy your application.
- Git: Git is essential for version control and collaborative development.
- Windows Command Line: You will use the Command Prompt or PowerShell to interact with the Serverless Framework and deploy applications.
Step-by-Step Guide: How to Run Serverless Deploy on Windows
Step 1: Install Node.js and NPM
First, you need to install Node.js and NPM (Node Package Manager) on your Windows machine. Node.js is the runtime that allows JavaScript to run on the server-side, while NPM helps you manage packages for your serverless application.
- Download the latest version of Node.js from the official website: Node.js Download.
- Run the installer and follow the on-screen instructions.
Verify the installation by running the following commands in the command prompt:
node -v
npm -v
- If these commands return the Node.js and NPM versions, the installation is successful.
Step 2: Install the Serverless Framework
Next, you need to install the Serverless Framework, which simplifies the process of deploying applications to serverless platforms.
- Open a command prompt or PowerShell window.
Run the following command to install the Serverless Framework globally:
npm install -g serverless
Once the installation is complete, verify it by running:
serverless –version
Step 3: Set Up Your Cloud Provider
To run a serverless deploy on Windows, you need a cloud provider account. We’ll use AWS Lambda for this example, but you can also use Azure or Google Cloud Functions.
- AWS: Create an AWS account at AWS Console.
- Azure: Sign up for Azure at Azure Portal.
- Google Cloud: Set up an account at Google Cloud Console.
For AWS, you will also need to configure your AWS credentials using the AWS CLI:
aws configure
Follow the prompts to enter your AWS Access Key ID, Secret Access Key, and the default region.
Step 4: Create a New Serverless Project
To start with the serverless deploy on Windows, you need to create a new project.
- In your command prompt, navigate to the directory where you want to create your project.
Run the following command to create a new Serverless project:
serverless create –template aws-nodejs –path my-serverless-project
Navigate into the project directory:
cd my-serverless-project
Step 5: Deploy Your Serverless Application
Now that your project is set up, it’s time to deploy your serverless application.
Open the serverless.yml file and configure your function details. For instance:
service: my-serverless-app
provider:
name: aws
runtime: nodejs14.x
functions:
hello:
handler: handler.hello
To deploy the function to AWS Lambda, run the following command:
serverless deploy
This command packages your code and deploys it to the cloud. After a successful deployment, you’ll receive an endpoint URL, which you can test.
Step 6: Test the Deployment
After deploying your serverless application, you can invoke it by running the following command:
serverless invoke -f hello
This command triggers the hello function in your serverless app, and you should see the output in the console.
Step 7: Monitor and Manage the Serverless Application
You can monitor the logs of your serverless functions by running:
serverless logs -f hello
You can also manage and update your deployed functions using the Serverless Framework commands.
Benefits of Serverless Deploy on Windows
Running serverless deploy on Windows comes with several advantages:
- No Infrastructure Management: You don’t have to manage physical or virtual servers.
- Cost-Effective: You pay only for the resources you use, which can save costs compared to traditional server hosting.
- Scalability: Serverless applications automatically scale up or down based on demand, so you don’t need to worry about scaling manually.
- Easy Updates: With the Serverless Framework, you can update and deploy applications with ease.
Common Issues and Solutions When Running Serverless Deploy on Windows
- Permission Errors: Ensure your cloud provider credentials are set up correctly using the CLI.
- Timeouts: Serverless functions may timeout if the code takes too long to execute. You can adjust the timeout setting in the serverless.yml file.
- Package Size Limits: Cloud providers impose limits on function package size. Ensure your deployment package is within the limits.
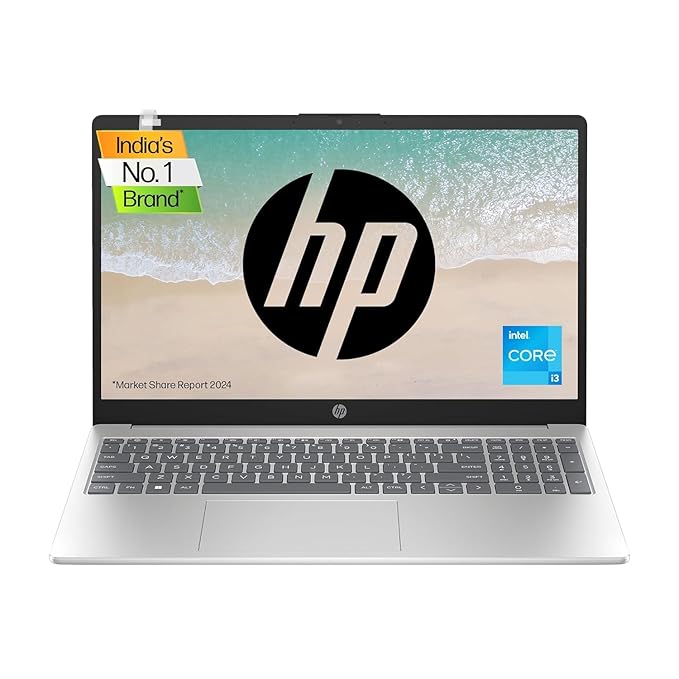
HP 15 Intel Core i3 13th Gen
About this item
- 【6-core 13th Gen Intel Core i3-1315U】Experience versatile computing with 8 threads and 10MB L3 cache, delivering a perfect blend of performance and power for demanding tasks.
- 【Intel UHD graphics】Immerse yourself in a seamless visual experience with Intel UHD graphics, ensuring speedy and efficient performance for various applications.
- 【Upgraded memory and storage】Run multiple programs effortlessly with 8GB DDR4 RAM, while the high-speed 512GB PCIe NVMe M.2 SSD helps you boot up in seconds, enhancing daily usability.
- 【Micro-edge display】Experience vibrant visuals on the 15.6-inch FHD, micro-edge display. The anti-glare panel and 250-nit brightness combine for a captivating viewing experience.
- 【Long battery life】Swiftly power up from 0% to 50% in just 45 minutes with HP Fast Charge. The 3-cell, 41Wh battery ensures worry-free usage for up to 7 hours and 45 minutes.
- 【Pre-loaded Win 11 and MS Office】Comes with Win 11 and MS Office 2021. To activate your MS Office, sign in or sign up, and follow the Office Activation Wizard.
- 【Effortless connectivity】Wi-Fi 6 (2×2) and Bluetooth 5.3 deliver a seamless and fast connection. Plug in all that you need with 1 x USB Type-C, 2 x USB Type-A, and 1 x HDMI 2.1 ports.
- 【Business conferencing】HP True Vision 1080p Full HD camera is crafted for effortless collaboration with a manual privacy shutter, advanced noise reduction, and dual speakers.
- 【Why HP】Experience the unparalleled advantages of choosing HP, the most preferred and trusted PC brand by Indians, empowering you with cutting-edge technology and steadfast dependability.
- 【Sustainably made】Choose an environmentally conscious laptop with recycled plastics, EPEAT Silver registration, and ENERGY STAR certification.
FAQ
The Serverless Framework is an open-source tool that simplifies deploying serverless applications to cloud platforms such as AWS, Azure, and Google Cloud.
Yes, you can easily install and use the Serverless Framework on Windows by following the installation steps.
To deploy a serverless app on AWS Lambda, install the Serverless Framework, configure your serverless.yml file, and run the serverless deploy command.
No, in serverless architecture, cloud providers automatically manage the servers for you, so you only focus on your code.
You can monitor serverless applications using the serverless logs command to view function logs and track performance.